Concrete Driveway Maintenance: What to Know

Maintaining your concrete driveway is very important for keeping it looking good and for prolonging the driveway’s life. To keep your driveway solid and free of stains for many years, there are several maintenance tasks that can help to keep it that way for a long time.

Proper curing is necessary to keep a concrete driveway from cracking. Allow at least one full week for the driveway to cure. Stay off of it at least seven days for lightweight vehicles and up to 14-30 days for heavy-duty vehicles or equipment. Uncured concrete is considered to be “green” and the concrete needs time to cure and harden prior to accepting normal traffic and daily use. For heavy construction equipment, wait at least 30 days before allowing heavy equipment to drive on your new concrete driveway. Avoid hard skids, tracking, and tire marks. Always seal the driveway to allow for lifetime use. Before sealing the driveway, use a power washer to thoroughly remove loose dirt, grime, and oil residue. You should plan on doing the initial seal and then reapply the seal every three to five years. There are two types of seals. One type is a “dry look” seal and the other is a “wet look” seal. Each type has its benefits and drawbacks. The “wet look” seal is less expensive, provides oil stain protection, however, it requires frequent application. The “dry look” seal is more expensive. It does not discolor the concrete and it lasts longer up to 10 years.

Concrete Driveway Installation

If you reside in a region that receives heavy inclement weather, i.e., ice and snow, where there is heavy use of road salt/sand mix and magnesium chloride on the roads and streets, consider sealing the driveway every one to two years. Heavy use of chemicals on concrete can cause spalling and deterioration. Spalling causes the concrete to breakdown, chip, crack, crumbling, and break into small pieces. Eventually, it will destroy the concrete surface. If possible, avoid using metal snow shovels that scrape and scratch the driveway surface. After the driveway installation is complete, sometimes small dips or low spots on the concrete surface. Very minor low spots referred to as “birdbaths” are not a problem. However, deeper puddles larger than two to three feet in diameter could become a bigger concern leading to spalling and long term damage. Consult with a concrete contractor or the company that installed the concrete driveway. In addition, don’t allow water to seep into cracks and freeze during the winter. It leads to cracking and spalling.

On a new concrete driveway, avoid oil spots that leave ugly stains from several months to years. Oil stains attract dust, dirt, and grime causing the stains to grow dark. Unsightly oil stains can be cleaned with a commercial de-greaser using a sturdy bristled brush, water, and scrubbing. Avoid using ice melting products. Such products are convenient and tempting to use, but avoid it at all costs. Using such products eventually leads to spalling and deterioration of the concrete surfaces. If you have stamped or patterned concrete on your driveway surface, it is imperative to avoid ice melting or de-icing products. Another problem involves digging near the driveway, avoid it. Digging the dirt near the concrete surface weakens the support grade.

Share

Tree Vs. Fence: The Tree Always Wins

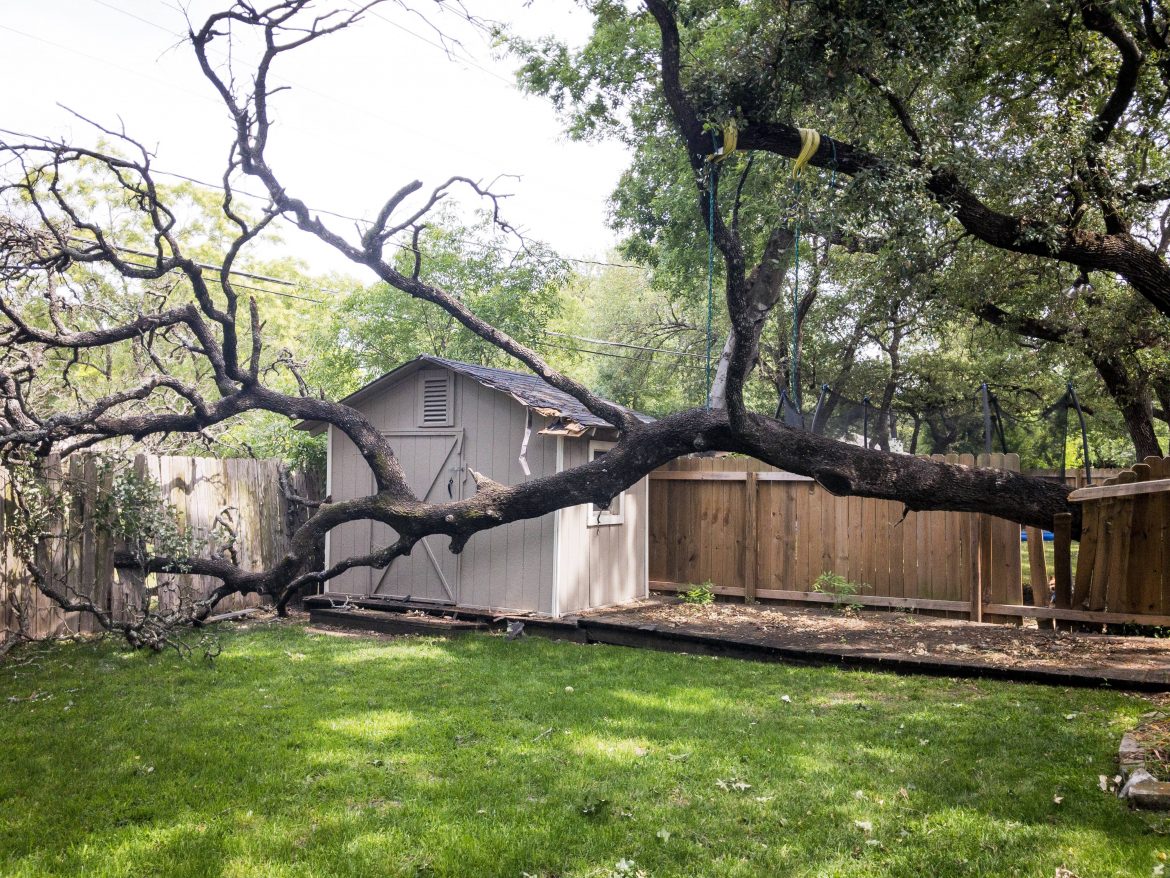
Sometimes a fence’s worst enemy can be the tree living alongside it.  God forbid a dead branch would fall on your precious fence and ruin your day.  Sometimes its just easier to say goodbye!

You’ve identified the signs and symptoms. You’ve grieved enough. But it’s official… It’s time for your tree to be removed. 

Now that you’ve called your local tree company, you’re probably wondering what to expect when they finally come. What goes on during the tree removal process? How much is this going to cost? Are there any necessary steps I should take in advance? To help you with the preparations, we’ve made a list of things you should anticipate. 

Uh huh, you’re welcome.

There are multiple determinants on how the tree removal will pan out. And we’re here to guide you through it to ensure a safe removal for you and everyone around you.

Here’s the rundown.

  • Oh No, My Poor Wallet!

I bet you’re already dreading how much this is going to cost. But to give you a rough approximate— for a relatively small tree, it costs about a couple of hundred dollars. But if we’re dealing with a big tree, it may hit the thousand mark. But if you want anything specific, don’t sweat. Most tree services offer a free estimation when they come to inspect it.


  • Read the Fine Print

When the tree company draws up a contract, before you sign— make sure to read it. Really read it. It must include all the services you want to receive for your tree. If there’s some stuff missing from there, you can always negotiate and draw up another contract that’s agreeable to both parties.


  • Send me Your Location


Let’s say the tree is pretty huge, but if you have the advantage of living in a massive estate, the tree removal can be executed without a hitch! As long as there are no obstructions in the direction where the tree is supposed to fall, the tree company can just cut it down the old-fashioned way. Just like the stuff you see in movies. 

But, if you’re a mundane city person, like most of us— it’s likely that you have neighbors, utility posts, and modest yards. They can’t just let the hacked tree fall in your neighbors’ yard (no matter how much you may want them to), so they’ll cut the branches one by one, and lower it using a rope to avoid disturbance in your area.


  • Pave the Way

Expect that there is gonna be a lot of commotion in your yard. Arborists and workers will flow in and out to assist in the tree removal. In light of this, it’s best if you think ahead and clear the way, so that they could do their jobs a lot more efficiently. While you’re at it, remove the things near the tree that could shatter in case of any freak accidents.


  • The Finale

After accomplishing the tree removal, it would leave a short stump. Tree services charge you extra if you want them removed, so in case you do, keep that in mind. What happens to the wood depends on your arrangement, but you can get it chopped and piled at the side.


We’ve shared what’s likely to happen to your tree in the following days, so you could prepare the necessary arrangements. In the meantime, you could say to expect the expected.

Share

Staining Your Wooden Fence: Pro Tips

Fences are what separate the outside world from the land you own. Not only does it mark what is yours, providing safety and security to your humble abode, but also beautifies your yard. Wood fences are great, but they can’t really hold their own against moisture. To deal with this, homeowners stain their fences. Not only does it combat moisture, it is also a cost-effective layer of defense from just about every type of damage that plagues one’s pickets.

So how do you go about staining your fence? Here’s how:

  1. Check Lumber Durability

The last thing you want is finishing a staining process only to have your fence break a day later. Make it a habit to examine your wood before you do anything to it. If it’s damaged or in a lesser state, make sure to run maintenance—fix it, replace anything that needs replacing, tighten screws and loose areas. Only then should you begin the staining process.

  1. Clean up your Fence

Now that your fence is in good shape, it’s time to clean it. Scrape off any dirt, moss, and debris that may have found their way on your fence. If there’s mold growing on the wood, spray a strong detergent on it to kill it and prevent future infestations. If you’re using wood cleaner, make sure you apply it evenly throughout the entirety of your fence line. Once you’re done, allow your fence to dry before moving to step 3.

  1. The Staining Process

Now we can begin staining. This part shouldn’t be too tough; all you need is a brush and wood stain (you can also use a roller or a spray as well.) Put a coat of wood stain on your brush and start going back and forth until you cover every exposed area. It’s important to apply the coat evenly so as to not have blotchy areas and puddles. If areas like these do occur, make use of a roller to even them out. 

  1. Sit Back and Relax

After finishing, then you’re pretty much done. Allow your fence to rest for a few days and keep an eye on it to make sure the staining process goes smoothly. The rest fence should rest for a few days, 48 hours at a minimum, but the process greatly depends on the humidity of your country.

https://StCharlesFence-Co.com

  1. Do Routine Maintenance

A week has passed since you stained your fence, maybe even a month or a year. However long it has been, it is important that you maintain your fence and its coat. Repeat step 1 and 2 every few months or so, checking durability and damages, repair/replace if needed. Clean the fence regularly so debris does not accumulate on the fence.

And there you go! That should be everything you need to know about staining your wood fences. Wood fencing is an important component of any backyard, and it is our responsibility to maintain them. Treat your fences with great care and they will stand in your yard for a very long time.

Share

Selecting a Proper Fence For Your Property

Wooden fencing can give a rustic feel to your lawn. It has aesthetics as well as functionality, and we have been using it for as long as we can remember. But when it comes to fence installation, you might find the variety somewhat overwhelming. There’s different forms, functionalities, and things to know about each of them that you wonder if it’s worth getting a line installed in your yard at all, what with all the different stuff you have to consider.

Well, fear not, stumped house owner. When it comes to selecting fences to install in your backyard, we’re the experts. Here are a few of the most common types of fencing out there.

Cedar Wood Fencing

Now this is the type of fencing you grow old with. Your kids can be born and get married before this type of fencing bites the dust. With a life expectancy of 15-40 years (if maintained properly), cedar wood fencing will transform your backyard into a time capsule. They have natural resistances to insects, and can be very stubborn when it comes to rotting. If you’re planning on painting your fence, however, you might want to forget about cedar entirely as its strong color will take several coats to get rid of.

Oak Fencing

Ah, the classic! With over 600 species, Oakwood fencing is coveted for its astounding durability and resistances. It isn’t much to look at (or maybe some people like it this way), but apply a little bit of natural oil and you’ll find its hidden beauty shine bright under the sun. It’s best to keep the natural color of oak though as stains can ruin its grains. You’ll have a lot of fun telling your grandchildren how your oak fencing is older than their parents.

Pinewood Fencing

Pinewood is very easy to work with because it has quite a soft texture, but don’t let that fool you. Pinewood has natural resistance to shock, meaning you can batter on it all day and you won’t get anywhere (don’t do that though). It’s creamy, light shade is a lovely addition to any yard and their gains and knots give a unique appearance, so no painting required! They’re relatively cheap too, so if you have a huge lawn then pinewood fencing is your best bet.

Redwood Fencing

If you have a big budget, then by all means. Redwood fencing is all about quality, aesthetic, and practicality. With a beautiful reddish hue, any backyard will look like a king’s court. In addition to beauty, redwood fencing is also resistant to weathering, bugs, and rot, making it one of the best kinds of fencing species. So if you have a bit of pocket money to spare, then redwood fencing will give your yard a beauty makeover.

Cypress Wood Fencing

Now this one can be a little difficult to deal with. Cypress has quite the odor that can be irritating to some people. The species can also be quite a strain to your wallet. On the upside, it’s natural resistances easily makes it one of the most long-lasting wood types, and its coarse texture and yellowish-brown hue makes it blend easily into any backyard it is installed in. Quite a chore to work with, but the pay-offs are definitely worth the effort.

Kansas City Fence Company

Share